Archives

All posts for the month January, 2011

My wife got me a new macro lens and macro ring flash for Christmas, so I thought I’d finally try them out. Why the delay? Well, the ring flash came with a couple of step down/step up rings to adapt to different lenses, but they didn’t fit my new macro lens so I had to order the right one. Yup, I picked it up yesterday and couldn’t wait to use it.

Remember, you can skip directly to the photo set on Flickr to see more photos from this set. You can also click on any of the photos below to bring up their Flickr page and leave a comment or set them as a favorite.

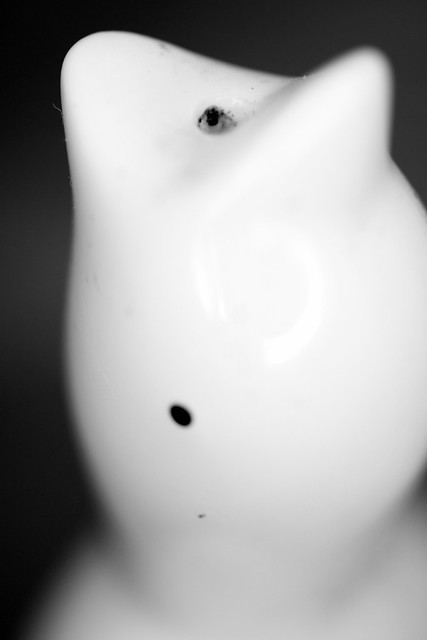
Pie Bird Head Monochrome

Hunting around the house for objects to shoot close up, I found this ceramic pie bird sitting on the shelf. I set the camera’s macro focus to 1:1, then carefully moved the lens closer to the subject until I got the desired focus.

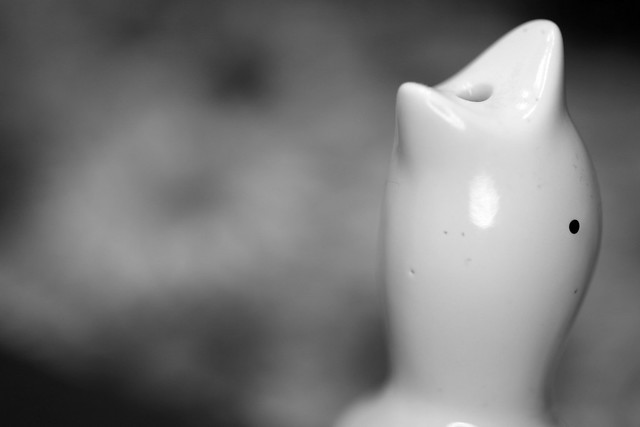
Pie Bird Head 3 Monochrome

Next, I backed off a little bit to take this shot, trying to capture more of the bird’s head at (hopefully) a more interesting angle. Both of these were taken with an overhead incandescent light shining down and the ring flash attached to the lens.

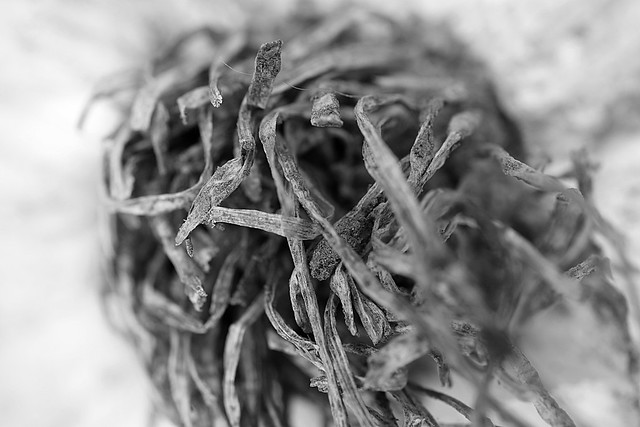
Garlic Head 6 Monochrome

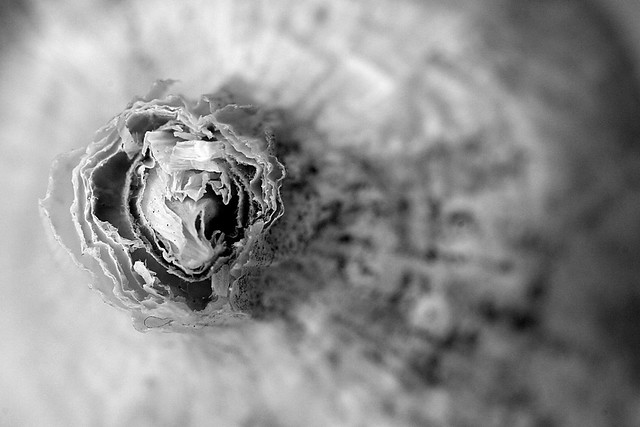
What is this? A ghastly beast emerging from the deep? Nope, just a nice macro shot showing the bottom of a head of garlic. I can’t help thinking the root cluster looks a bit like ominous tentacles reaching out for you.
Garlic Head 4 Monochrome

From this perspective at the other end of the head, it takes on the look of a stratovolcano shot from a helicopter hovering above it.
Lambourghini 2

Oh yeah, I also got a Lamborghini Reventón for my birthday last year. It’s a little bit difficult to get into it, so I’ve not actually taken it for a drive yet, but I suppose that’s to be expected from the Matchbox edition of this supercar. Still, I think I captured a bit of its speedy nature here. For this shot, I got a piece of plain white paper to use as a backdrop.

All of these were shot in our “makeshift studio” in our dining room. Lori has set up a very functional area just off the kitchen so she can take photographs for her soon to be launched food blog. Here’s a quick shot of that studio showing, from left to right:

  • A black and a white reflector board on glass shelf standards.
  • A compact florescent bulb in a desk lamp stand.
  • A large cooler on or over which can be draped various backdrops
  • Atop the cooler are a couple of bamboo place mats used for backdrop.

Makeshift Studio

This was a great setup for my macro experiments. Hopefully I’ll be inspired to take some more of these in the future, and perhaps I’ll contribute a few shots to my wife’s new blog.

I think I’ve picked an excellent photographer to open this Category on my blog: Mr. Flibble. Irreverent, wacky and whimsical, yet at the same time cerebral and engaging. I couldn’t help but browse his entire photostream — Yes, every single photo entered my irises and tickled my visual cortex.

At the risk of driving you away from my own blog, I’ll lead with some important links to his work.

Now on to my critique. First one, so it may be a bit rough. Please endure!

I think the best way to critique this particular photographer will be to select a spectrum of his work. While he may be gaining notoriety for his recent distorted, ‘shopped and humorous creations, I feel it is important to dig a little deeper and reveal the underlying talent and evolution which is evident by browsing further back in his photostream. To start, the photo that sucked me in:

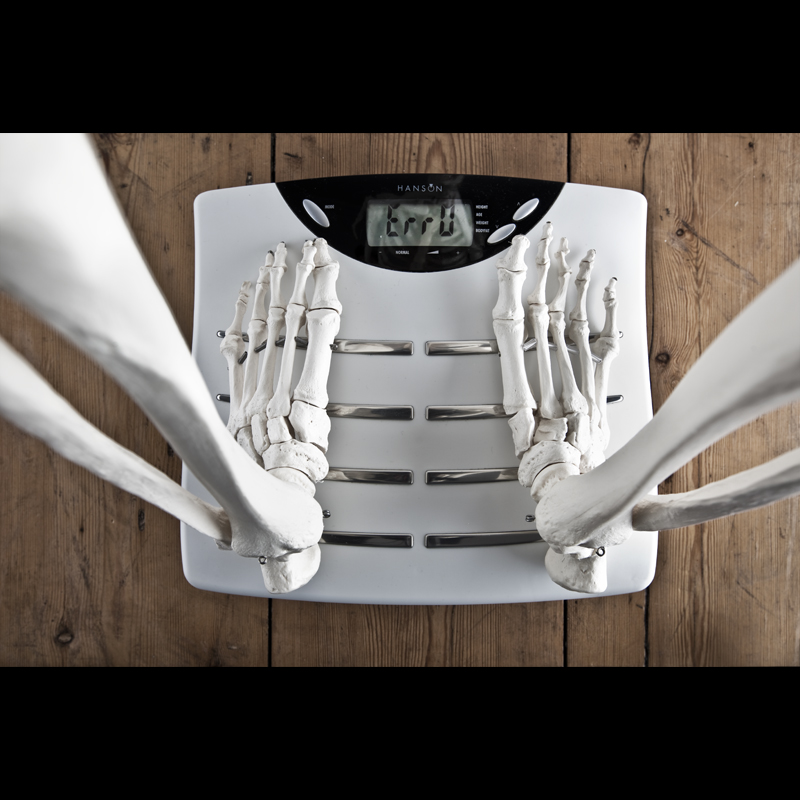
383/730: New sulphuric acid diet was maybe too drastic

New sulphuric acid diet was maybe too drastic

But wait, there’s more. This photo grabs your attention and the caption is hilarious, but Mr. Flibble is not done with you yet. The description of this photo on Flickr continues to entertain:

Not all of us are given free rein to lunge, stretch and perspire over ever part of the asylum. And as such, even the normally enthusiastic Flibble is prone to the odd love handle.

Not odd in that away, you understand. I hear it’s perfectly normal for love handles to protrude 45 inches outwards towards the ears before circling back towards the pelvis.

Anyway… a diet was in order and this one seemed so easy: “Just take half a litre of sulphuric acid with each meal and snack, and see the weight fall off you” they claimed.

Perfect.

Not being one to disobey unfounded claims, I embraced this diet with much gusto – even snacking between snacks just to be able to imbibe more of this magical “acid” they talked of.

Weighed myself today.

Something may have gone wrong.

Even the scales seem to suggest this might not have been my most splendid of ideas…

*sobs*

I’m on Twitter: @IDrinkLeadPaint

Strobist:
Softbox camera left at floor-level on 2.0, Second softbox camera right at floor-level, stupidly set on 2.5. Triggered by cable.

Yeah, so when he’s done melting your brain with sulfuric acid, he goes on to give you some juicy, technical details of how he achieved this wonder by providing strobist info. How cool is that? Super Cool, my friend.

The photo and caption grabbed me, the narrative in the description drew me in, and the details kept me coming back for more. That wood floor as a backdrop. Rough-hewn, wide hardwood. The perspective, although head-on and dead center on the scale itself, draws your eyes down the tibiae toward the center. Even the reflection of the skeletal ribcage in the LCD display on the scale and the skeletal nature of the metal “ribs” on the surface of the scale (why are those there? Perhaps a BMI feature of this scale?) work to increase the interestingness of this image.

Now, on to another absurdity which grabbed my attention.

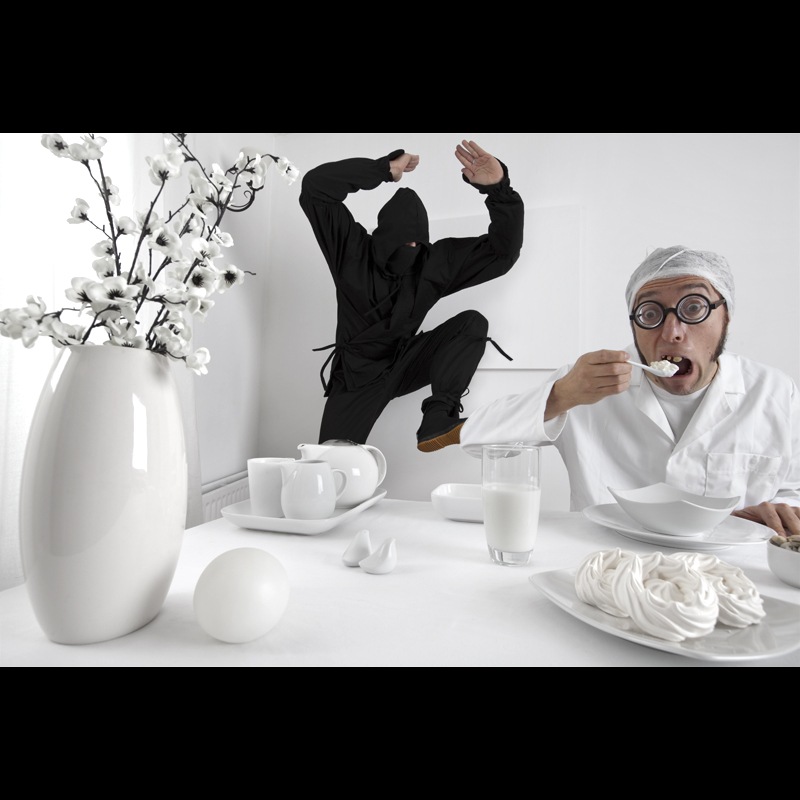
381/730: Advanced ninjaing

Advanced ninjaing

While I much prefer Samurai to Ninjas, I couldn’t help but chuckle at this one upon first sight. But, again, Mr. Flibble delivers much more than expected. His description starts:

Dr. White was such a quiet, neat and polite man and seemed the most unlikely person to provoke the wrath of the asylum’s trainee ninja department, but he did, and today he paid the ultimate price.

It goes on. Please click the image above to continue reading. I’ll wait here should you decide to return.

Ahh, thank you for returning! Black, white, grey and Ninjas? What more could you ask for, but Mr. Flibble delivers it all. I love the setup here. There is so much detail, you can keep coming back to find something new. The textures of Dr. White’s lab coat and the “poofs” on the plate in front of him. The contrast of the deep blacks — not only in the ninja’s uniform, but also of Dr. White’s glasses frames and the stems of the flowers in the vase. One could almost remove the Ninja and Dr. White and still have a stunning photograph.

And now on to some alternative samples from Mr. Flibble’s work which show the underlying talent, absent the absurd, but still retaining the whimsy and vision that pulled me in so much that I did view his entire photostream.

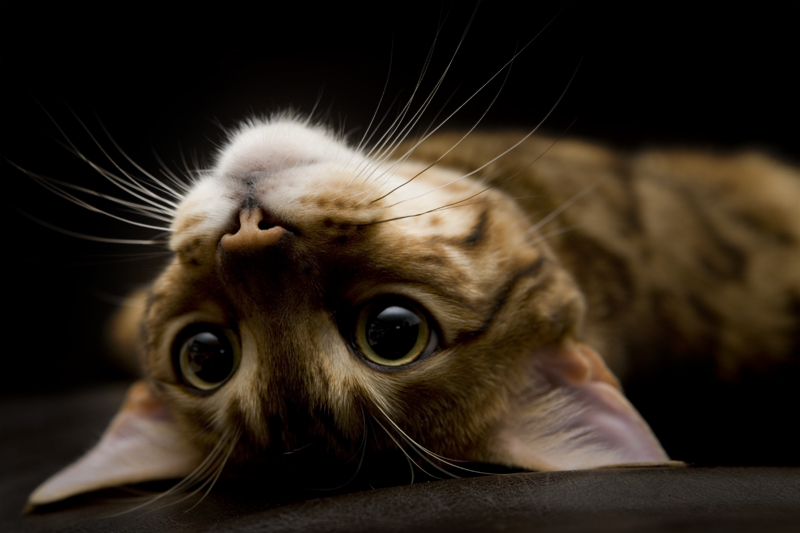
Gremlin or Mogwai?

Gremlin or Mogwai?

Everything about this photo works:

  • Shallow depth of field with well-chosen point of focus
  • Black backdrop and foreground
  • Inverted subject
  • Cute!

Yet it still retains the essence of whimsy without the patent absurdity of his later photos. I’ve started following Mr. Flibble’s RSS feed on Flickr in hopes of seeing more photos like this in the future — albeit intermixed with the funny and absurd.

Next up, the abstract.

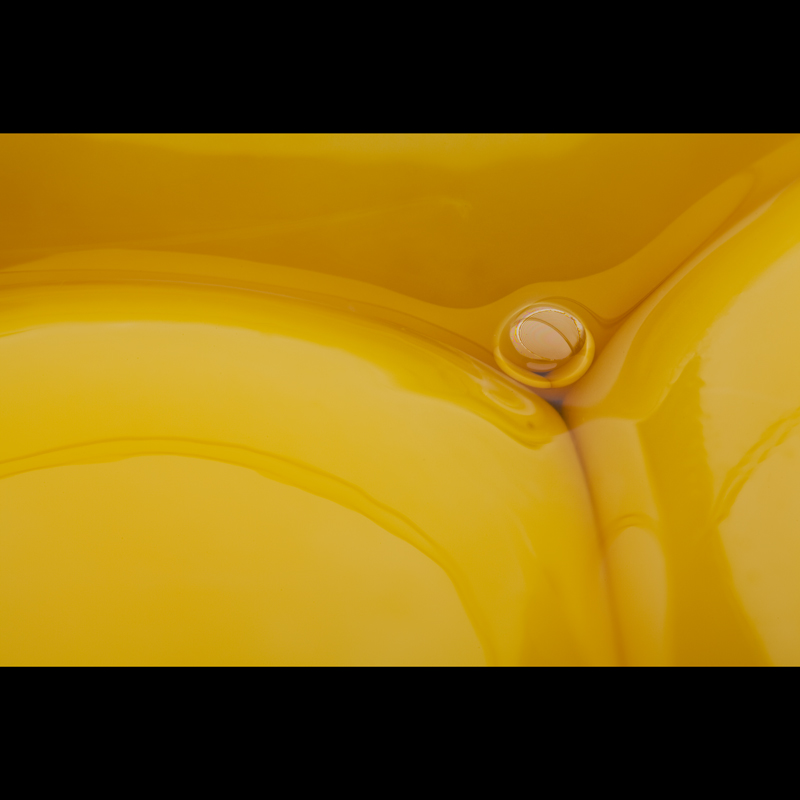
315/365: Yolk folk

Yolk folk

From the brief description on Flickr, you get the impression that he considers this a “throw away” shot, but I feel it shows he has photographic vision. While hunting for subjects to fulfill his 315/365 Project, he managed to find this gem amongst the routine of his life. The lines, the color, the bubble and the lighting all converge slightly off-center for a wonderful composition.

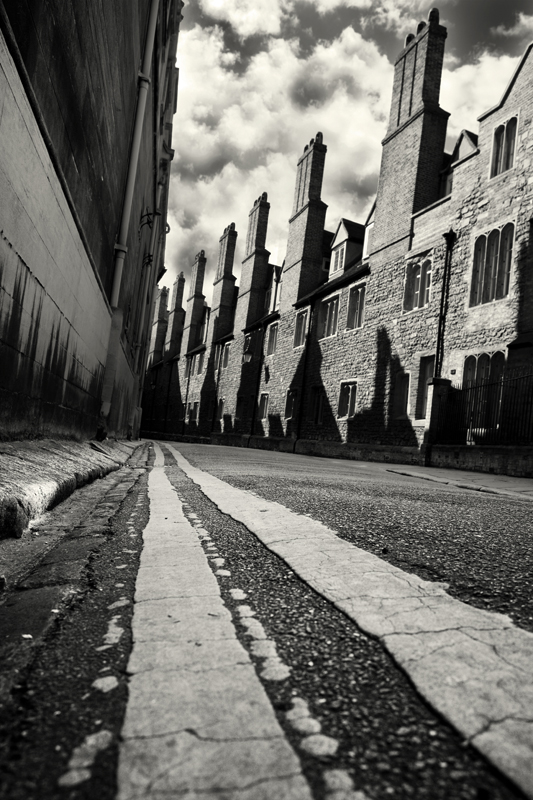
What does a good photographer do when faced with a subject that has been captured so many times over and over? Change the perspective!

In the gutter of Cambridge

In the gutter of Cambridge

A Google search of “Trinity Lane Cambridge” turns up several photos, but none of them as interesting as this. The forced perspective makes the buildings shrink into the background, looking more like cut-outs than stone and mortar. Texture, form, shadow and light mix perfectly here. I find myself discovering new details with each view — a true sign of photographic genius.

Finally, a bit of social consciousness.

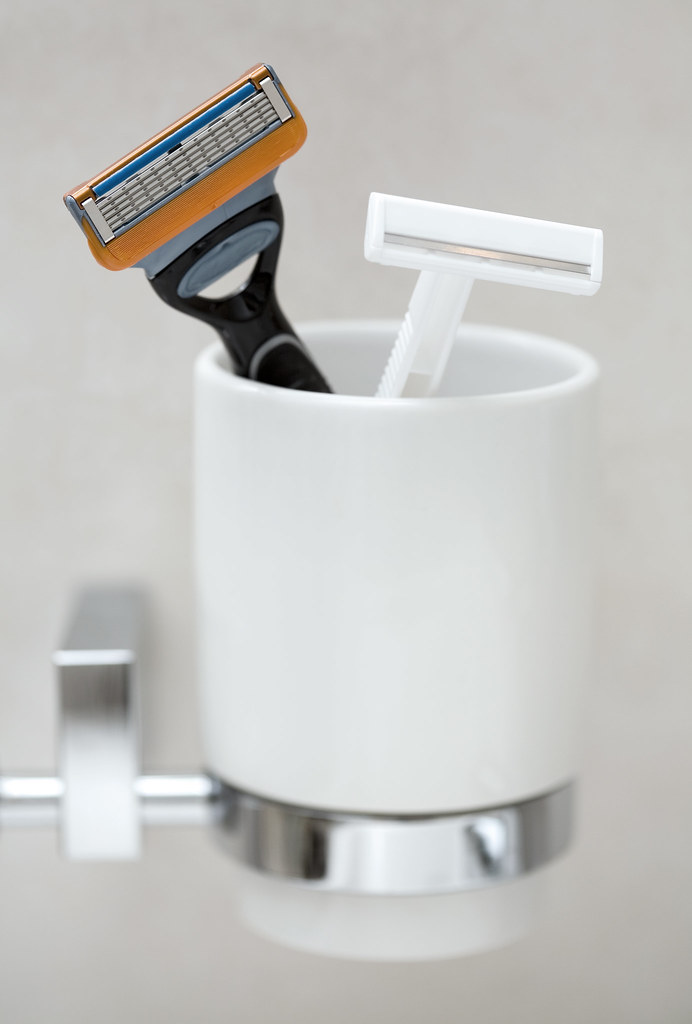
Feature creep

Feature creep

Juxtaposition, contrast, depth of field and social consciousness all in one? Yup. And all accompanied by a bit of poetry:

The endless pursuit:

More blades
More plastic
Batteries
More colour
More marketing spin
More money
More landfill
More complicated
More compulsion to upgrade
More more.

Where will it ever end?

Unfortunately, I think the answer to Mr. Fibble’s question is yes. Yes, it will come to an end, but not before it hyper-extends into the beyond!

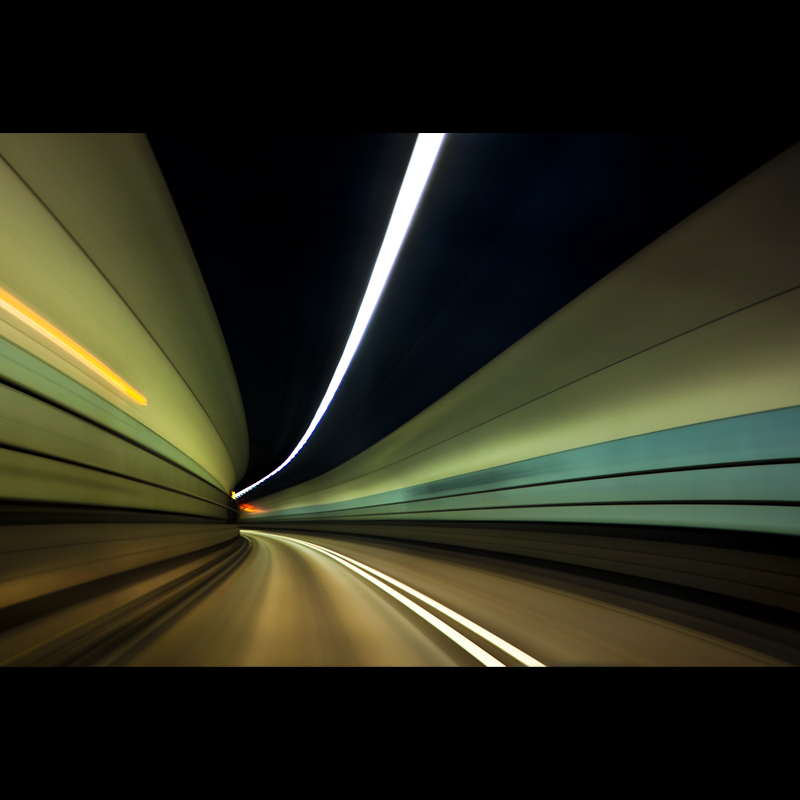
368/730: Dartford tunnel

Background

I’ve been happily running this site on Textpattern (version 4.2.0) for a couple of years now with no issues or concerns. It has been a solid platform and I found a good template which I was able to customize to my liking. Recently, however, my wife has expressed interest in starting her own blog (more on that to come), and she wanted to use WordPress primarily because she had used it before.

Over the past couple of months, I’ve been working a lot with WordPress in support of Lori’s effort to bring her blog to life. We’ve been running an internal development site during that time to find the right theme, customize that theme, play with different post presentations and build some content prior to launching. She’s very serious about taking this blog live, so I figured I should probably get serious about learning as much as I can about WordPress.

This post is all about my experience converting from Textpattern 4.2.0 to WordPress 3.0.4.

Finding a Theme and Testing Migration

The first thing I did was install WordPress 3.0.4 on my internal server so I could play with different themes and test migrating my old content. Since I’ve been doing a lot more photography recently, I tried to find a photo-centric theme. After looking at four or five different themes, I settled on F8 Lite by Graph Paper Press. I’m a big fan of its clean, simple grid presentation and the focus on photography.

During my initial testing I discovered that the standard process for creating a child theme under which to make your customizations did not work. I’ve not figured out why it breaks, so for now I’m working with a full copy of the original theme. I’ll have to keep track of what I’ve customized so I can re-apply those customizations when an updated version of this theme comes out (hopefully that won’t be often).

Another issue I found while researching migration from Textpattern to WordPress is that the built in tools for Textpattern migration have been broken for quite some time. Some people have developed some work-arounds, but it seemed the process was hit or miss depending on the versions of each platform in use. I noted, however, that there was a generic import tool which would utilize the old site’s RSS feed to import posts. I tested this out and it worked very well. All the post content was imported (some caveats on that later) and only some minor formatting issues were introduced.

After playing with the F8 theme and my imported content for several hours I decided to go ahead and start the process of migrating my live site.

Migration Preparations

Any successful migration starts with a full backup of the old site so you can restore it should something go horribly wrong. Textpattern, just like WordPress, is a MySQL/PHP based site, so there really are just two things to back up: the database and the site files.

First, I backed up the database with the following:

mysqldump -u root -p txp_database | gzip -9 > 20110116_textpattern.sql.gz

Breaking that down, I called mysqldump with a root account, prompted for that user’s password (-p) and dumped the database called txp_database. Since mysqldump outputs to standard out, I piped that through gzip with -9 for maximum compression, then re-directed it into the final file. I like to put the date as the first part of a backup filename so it is easier to distinguish later if I have a bunch of backup files in the same location.

Next it was time to back up the textpattern site files. This contained all the PHP code plus all of the customizations I’d made to that code and the site graphics. After changing to the directory under which all this lives (varies by server configuration, but could be /opt/textpattern or /usr/share/textpattern) I then issued the following:

sudo tar -czvf /tmp/20110116_textpattern_files.tgz ./

Breaking down this sequence, I escalated my privileges to root with sudo, issued tar to create (-c) a compressed (-z with gzip, use -j for bzip2), with verbose output (-v), file with the given name (-f) containing the contents of the current directory (./). Note that I placed the output file in a different location than the current directory to avoid any problem with the tar process trying to recursively include its output file in the input. It would also be a good idea to move both the MySQL dump and this backup file to a common location for safe keeping — leaving either under /tmp is a bad idea because some systems clear the contents of that folder upon rebooting.

At this point, I could completely mess up Textpattern and I would be able to utilize the contents of these two files to restore it all back to its current condition.

Migration and Importing Textpattern Content

Once all the backups were out of the way, it was time to move the WordPress files and database from my development site to my “live” Web server. This was the tricky bit, as I discovered some of the initial setup was migrated with the database and there was no easy way to re-configure those settings. Most notably, the site URL kept re-directing me to my local dev site after I migrated the files. I ended up starting with a fresh copy of the database, but using my modified WordPress files. I had to re-configure the site and re-import the Textpattern content, but that was easy to do since I already had a dump of the rss feed.

First, I wrapped up my WordPress development files in a tar/gzip file, similar to backing up by issuing the following after changing to the root of the WordPress folder on my development server:

sudo tar -czvf /tmp/20110116_wordpress_files.tgz ./

I then copied that tgz file up to my server and uncompressed it to a WordPress folder by changing to that folder and issuing:

sudo tar -xzvf /tmp/20110116_wordpress_files.tgz

Next, I issued the following sequence to get into MySQL, then issue SQL statements to create a fresh database:

mysql -u root -p
create database wordpress;
grant all privileges on wordpress.* to 'wp_user'@'localhost' identified by 'wp_password';
quit

Breaking that down, the first line opens a MySQL command prompt with root privileges. The next line creates the wordpress database. The third line simultaneously creates the user ‘wp_user’ with the password ‘wp_password’ and grants that user full access to the wordpress database. The last line quites the MySQL interface.

At this point, my old Textpattern site was still live, but I had to configure the WordPress site. I decided to quickly switch over to the WordPress site and finish up the configuration. To do this, I simply had to edit my /etc/apache2/sites-available/default file so it pointed to the location of the WordPress site instead of the Textpattern one. All the rest of the settings in that file remained the same.

Once that was done, I hit the wp-admin URL to complete the site setup and create a site administrator user account. I then logged in as the site administrator and fired up the rss-importer plugin, which I had already installed as part of my development site, and it came over when I copied those files. But first, a word on getting that RSS content out of Textpattern. . .

The rss-importer plugin takes as its input an RSS XML file. In order to generate such a file from Textpattern, I had to go into the site settings and set the RSS feed to present all of my posts in the feed and set it to place the entire contents of each post in that feed. Once that was set, I visited the site and right-clicked on the RSS link, saving that link as a file called rss.file. Within my WordPress development site, I was then able to upload the contents of rss.file into the rss-importer plugin. Here are my caveats about this method and why it worked for me, but might not work for you:

  1. My Textpattern content was all code/text. All of my images were hosted from my Flickr account. I don’t believe site embedded pictures would have transferred with this method.
  2. There is a 2 MB file upload limit in WordPress. I only had 108 posts in Textpattern and the RSS XML file was under 500 KB. I believe you can increase the 2 MB limit, if needed.
  3. The import wasn’t perfect. Some formatting was lost. I spent a significant amount of time going through each of the 108 posts and adjusting the formatting. A better import method may have preserved this formatting.
  4. The categories did not import either. I had to go through all posts and assign categories and tags. I’m not sure if any of the other import methods would preserve categories. I wanted to re-work these anyway, so this wasn’t a big loss.

Aftermath and Conclusion

So, yeah, I had to touch every post and fix some formatting. I also had to set up new Categories and set tags on each post. Good thing I’m not a terribly prolific blogger, or I would have had some tough choices to make. As it was, 108 posts weren’t too bad. The later posts were more complex, requiring more attention. As the posts got older, there was less to do, so the last half to one quarter went a lot quicker.

Overall, I’m happy with the look of the site and the way this theme integrates with WordPress. As mentioned before, I still need to work out the child theme issue, but hopefully I can figure that out in my development site soon. I’m also going to dig into the CSS of the site and change up some of the colors. I don’t like the red article link headers and hyperlinks, and I want some of the fonts to be just a bit larger.

My work on this site will never be done, but that is the way of the blogger. . .
Background

If you aren’t familiar with GNU screen, you really should stop right now and familiarize yourself with it. This is a very powerful utility which allows you to run terminal based programs on a system, disconnect from that session and re-connect later from the same or a different location. You can also start multiple terminals within a given screen session. Whenever I ssh into a system, I almost always launch screen first. If my ssh session gets disconnected unexpectedly, I can simply re-connect and pick up where I left off by re-attaching to the screen session.

The Problem

I was recently working with a client on a process that was going to take quite some time to complete. The command we were running would give a progress indicator, so we could monitor the progress off and on over time. I assumed, since we both had the ability to utilize sudo to change user privileges that he would be able to sudo su – myusername followed by screen -r to take over the screen session I had started which contained this command. When he tried this, however, he was greeted with the following error:

Cannot open your terminal '/dev/pts/1' - please check.

The Solution

Searching around on Google comes up with a couple of different solutions. One of these solutions suggests that the second user should change the permissions on his tty to allow everyone access to it. While this works, it is definitely a Bad Idea for security as any user on the system could then snoop that tty.

The other solution suggests that the second user should issue script /dev/null after escalating themselves to the first user’s account. This works and does not appear to have the same security implications as the method above because everyone retains access to their own tty’s.

But Why Does This Work?

What I found was that none of the posts I ran across which presented the second, preferred solution explained why this works. They merely said, “use this method,” and left it at that. Being naturally curious, and harboring a concern as to whether this also opened up a tty to others’ snooping, I had to investigate.

Prerequisites

Of course, this all assumes that at least the second user has the ability to sudo su – and escalate their privileges. That is all. Let’s move on.

Stepping Through The Process

Here’s how I went about discovering what exactly script /dev/null does and why it allows the second user to access what appeared to be an inaccessible tty.

First, usera logs in via ssh, checks which tty was assigned, checks the permissions on that tty and launches screen:

usera@localhost ~ $ ssh usera@remotehost
usera@remotehost ~ $ tty
/dev/pts/1
usera@remotehost ~ $ ls -l /dev/pts/1
crw--w---- 1 usera tty 136, 1 2011-01-09 20:14 /dev/pts/1
usera@remotehost ~ $ screen

As you can see, usera has RW permissions, group members have W permissions and others have no access at all to this tty. Next, userb logs in to the same system via ssh, checks which tty was assigned and checks the permissions on that tty:

userb@localhost ~ $ ssh userb@remotehost
userb@remotehost ~ $ tty
/dev/pts/2
userb@remotehost ~ $ ls -l /dev/pts/2
crw--w---- 1 userb tty 136, 2 2011-01-09 20:20 /dev/pts/2

Again, the same permissions are present on the tty assigned to userb. So neither user can snoop on the other’s tty at this point. Here’s where it gets interesting, though. Let’s have userb escalate to usera and check the tty assignment and permissions again:

userb@remotehost ~ $ sudo su - usera
[sudo] password for userb:
usera@remotehost ~ $ tty
/dev/pts/2
usera@remotehost ~ $ ls -l /dev/pts/2
crw--w---- 1 userb tty 136, 2 2011-01-09 20:20 /dev/pts/2

This is where I had my “aha moment.” Although userb has changed to usera, the same tty (with the same permissions) is in use. Therefore, all commands issued are now under usera but any command which tries to manipulate the tty (like screen does) will fail because the tty remains under control of userb.

So now let’s take a look at what script /dev/null does to the tty:

usera@remotehost ~ $ script /dev/null
Script started, file is /dev/null
usera@remotehost ~ $ tty
/dev/pts/3
usera@remotehost ~ $ ls -l /dev/pts/3
crw--w---- 1 usera tty 136, 3 2011-01-09 20:36 /dev/pts/3

Ahh, we now have a new tty assigned to this user. Therefore, when screen -r is issued, the currently assigned tty, /dev/pts/3 is accessible to usera and the command succeeds! Also note that this new tty has the same permissions as the original usera tty, so it should be just as secure from snooping.

Conclusion

If you need to share a screen session with another (admin-rights holding) user, then the script /dev/null method is much preferred over mucking around with tty permissions. It appears that the script /dev/null method is just as secure as the original user’s tty because the permissions on the new tty are exactly the same.

On a more general note, be aware that solutions you find on the Internet might work, but they may not always be the best solution for the task at hand. Be sure you understand the implications of what you are doing instead of blindly copying and pasting commands you found on someone’s blog. If you are not sure what a particular solution does, I encourage you to test as I did (on a non-production system, of course) to make sure you understand it before you put it to use.

I’ll start off with the Ceramic Sushi. Saturday Lunch wasn’t very exciting so it is at the end. Be sure to visit the Flickr set for more photos. You can also click on the photos below for larger versions on Flickr.

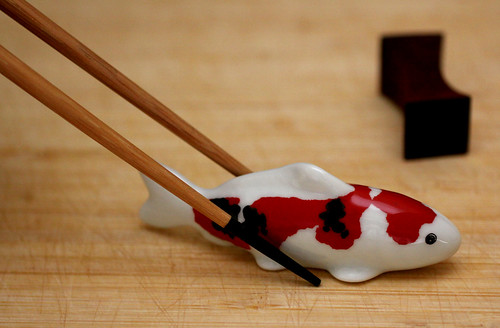
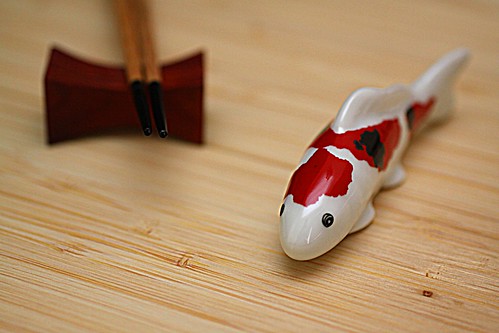
I bought this cute little ceramic koi for my wife in Japantown, San Francisco during our last trip there. She was busy at a conference while I explored the city.


Bamboo with Ceramic Koi
Ceramic Koi


I picked our bamboo cutting board as the base. We also have some bamboo chopsticks. Hmm, fish, bamboo, chopsticks. Anyone for some Ceramic Sushi?


Ceramic Koi in Chopsticks
Ceramic Sushi can’t swim away, but it isn’t very tasty either


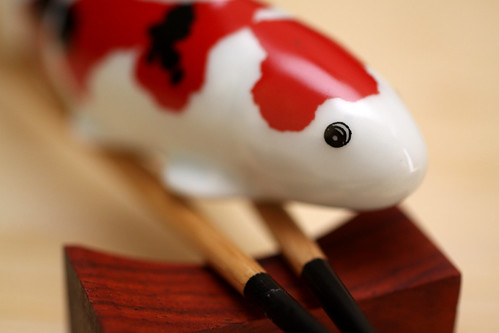
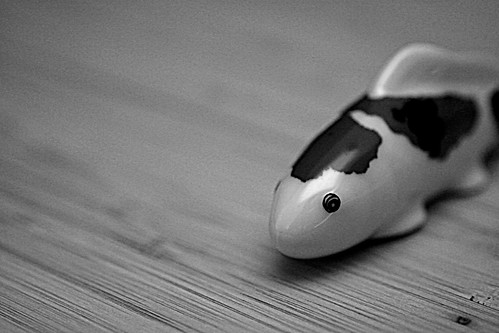
There is wonderful detail on this hand painted piece. Here’s a close up.


Ceramic Koi Close Up
Koi Klose-up


In these last couple of Koi photos, I used Gimp to try to simulate a grainy photo texture which you could get on film cameras by “pushing” the film exposure. I think they turned out pretty good. You will need to click through to Flickr to appreciate the effect.


Grainy Ceramic Koi on Bamboo
Don’t push me too much

Ceramic Sushi Now With Grain
Pushing with color


And now, What’s For Lunch? Chicken nuggets and barbecue sauce, of course!


What is for lunch today
Mmmm, chicken nuggets


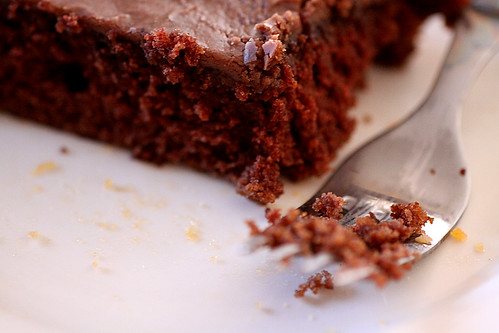
Don’t forget desert. Home made Chocolate Cake!


After Lunch Cake
Lori made this. Once she makes her blog public, maybe I can link to it.


Like I said, lunch wasn’t terribly exciting. Hopefully by now you’ve gotten bored and have clicked on to better things than my little blog.